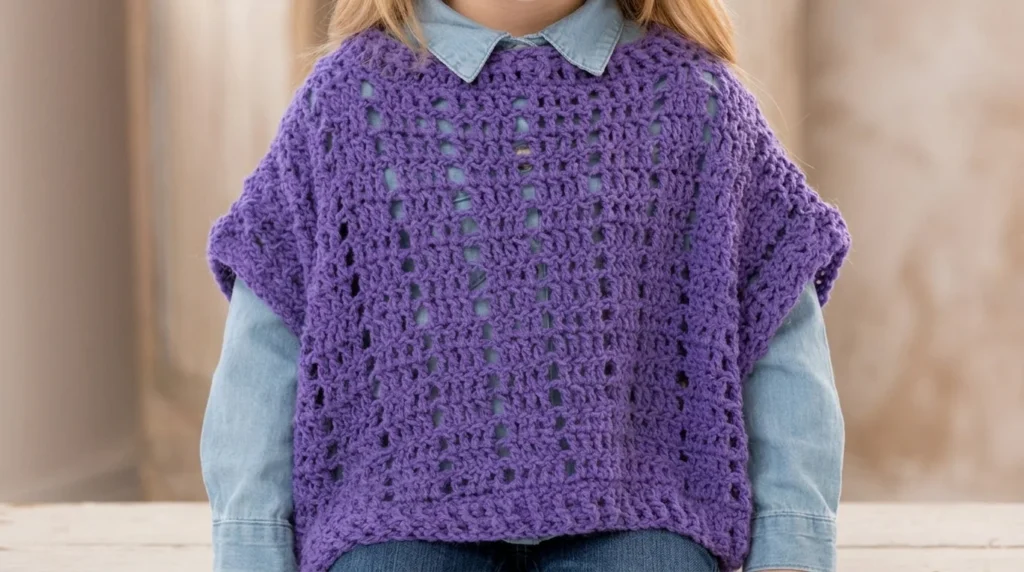
When you are looking for the perfect project to introduce a touch of handmade charm to a child’s wardrobe, this cozy wrap is the ideal place to start. A classic piece of crochet fashion that is both practical and stylish, it offers a gentle introduction to garment making without the complexity of sleeves or tricky armhole shaping. The openwork design looks sophisticated, but it relies on simple, rhythmic stitches that grow quickly on your hook.
We will be using a soft, light-weight chenille yarn for this project, which provides a plush, velvety texture that feels wonderful against the skin. Because it works up so well in this weight, you get a warm, comfortable garment that holds its shape beautifully. Whether you are a newer maker or simply looking for a relaxing, weekend-friendly project, you will enjoy the satisfaction of seeing these panels transform into a finished wearable that is ready to layer over any outfit.
Is this a good project for you?
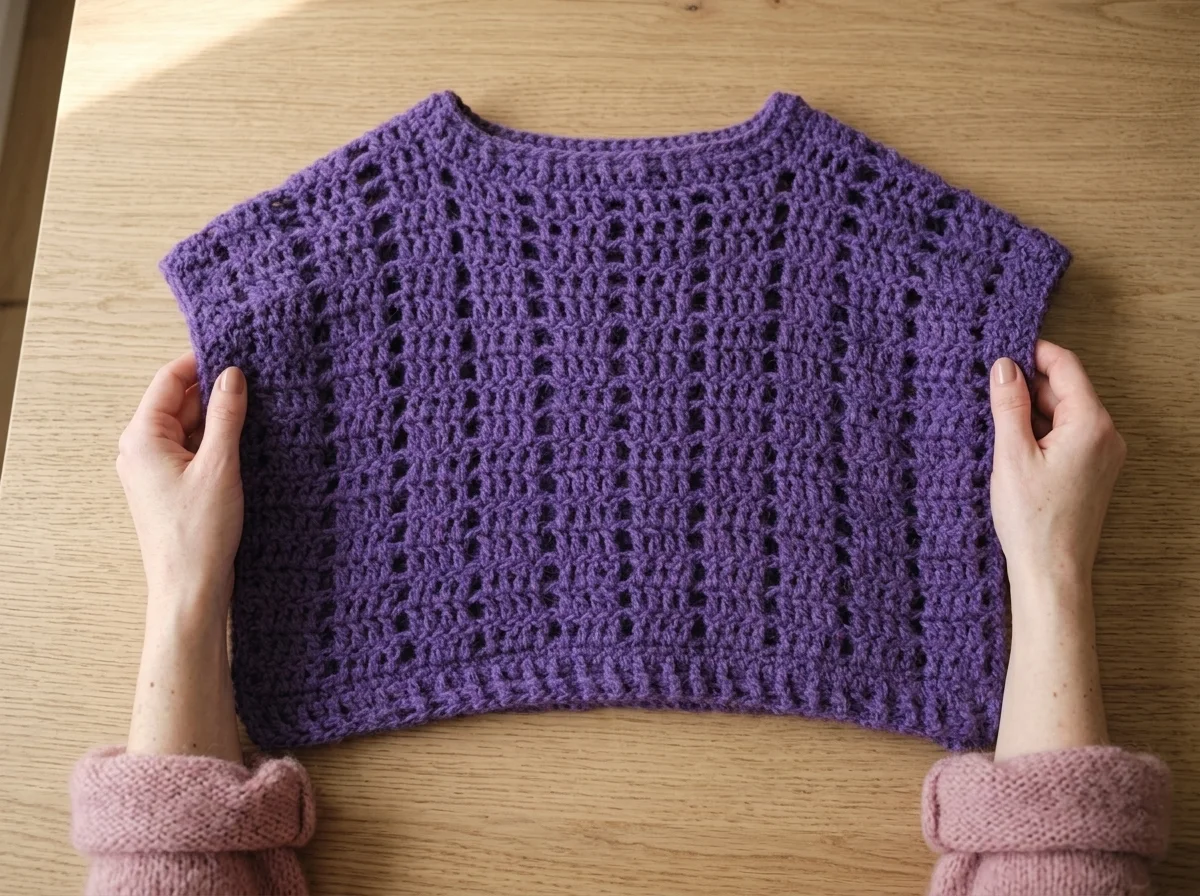
If you are looking for a project that feels like a big accomplishment without the stress of complex, intricate designs, this crochet fashion poncho is a fantastic choice. It is rated for beginners, making it an ideal step into garment making. Instead of working in the round from the start, this pattern uses two straightforward panels—a front and a back—that eventually come together to create a cozy, wearable piece.
What makes this specific project so rewarding is the balance it offers. You get to practice the basics of flat row construction while introducing subtle, professional-looking details. By working with a soft, light-weight chenille yarn, you will quickly see a plush, luxurious fabric take shape under your hook. It is the perfect project to practice your tension without worrying about complex increases or complicated stitch patterns.
Beyond the simple main panels, this design introduces you to post stitches. These are the secret to that beautiful, ribbed texture along the bottom and necklines. Learning how to work around the post of a stitch rather than into the top loop is a foundational skill that will serve you well in future projects, from sweaters to hats. You will also learn the basics of seaming and finishing, which are the final, satisfying touches that turn a flat piece of fabric into a structured garment. By the time you weave in your last end, you will have gained real confidence in shaping and assembly, all while creating a gift-worthy piece for a young girl in your life.
What you’ll need
To create this cozy project, you will need a few simple supplies. Because this pattern relies on a specific stitch count to maintain its drape and shape, it is important to double-check your gauge before you begin. Choosing the right yarn and hook combination ensures that your finished poncho is soft, comfortable, and fits exactly as expected.
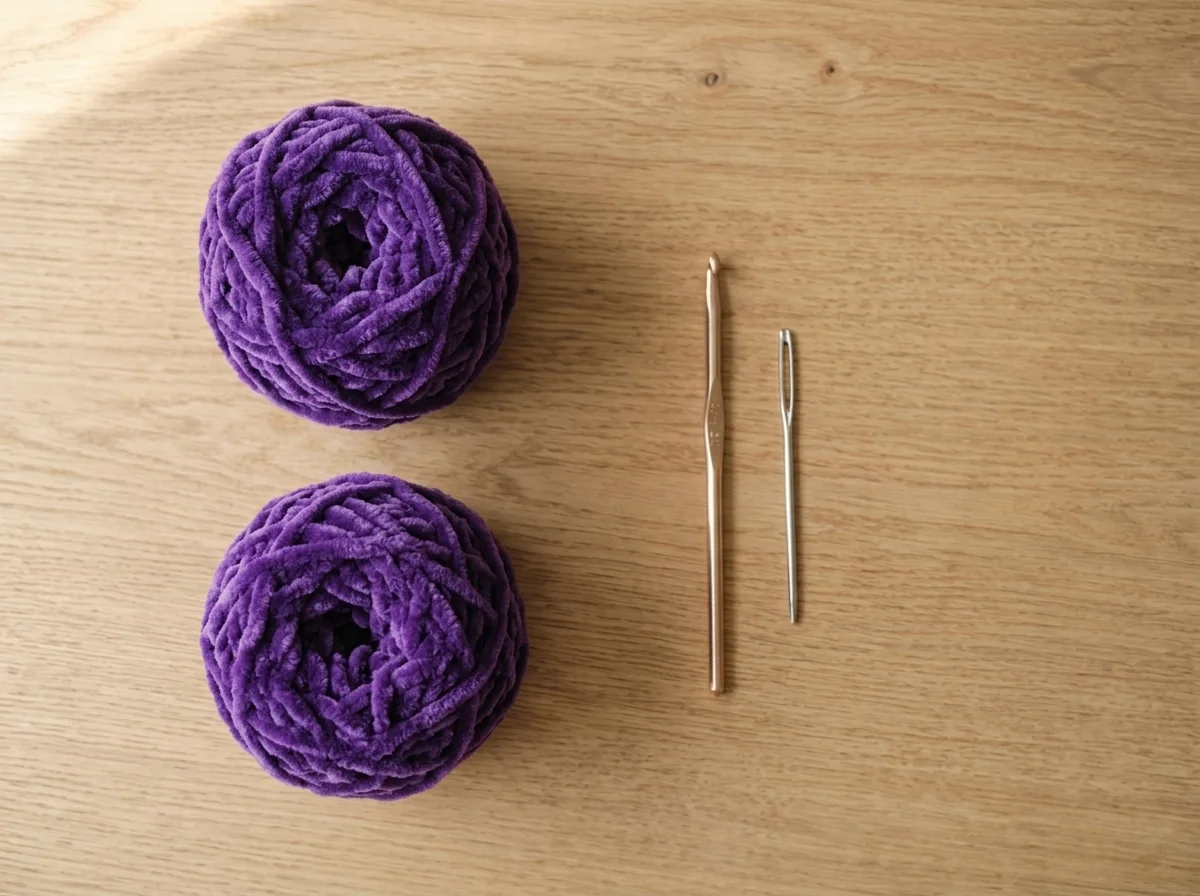
Yarn: This pattern calls for a light-weight (3) chenille yarn. Chenille is a fantastic choice here because it provides a plush, velvety texture that feels wonderful against the skin, making it perfect for children’s garments. You will need 1 (2, 2, 2) balls of yarn, depending on the size you are making. Because chenille can sometimes be tricky to frog, take your time while working your first few rows to get a feel for the material.
Hook: You will need a 4mm (US G-6) crochet hook. While this is the recommended size to achieve the gauge specified in the instructions, feel free to adjust your hook size if your tension is significantly tighter or looser. The goal is to create a fabric that is flexible and drapes well, rather than one that is stiff or overly dense.
Notions: Beyond your yarn and hook, you only need a yarn needle to weave in your ends securely once the assembly is complete. That is it! Keeping your workspace organized with just these few tools will help you focus on the rhythm of the stitches as you craft this stylish piece.
Essential stitches and techniques
To achieve that beautiful, raised texture on the hem and neckline of your poncho, you will need to become comfortable with post stitches. If you have only ever worked into the top two loops of a stitch, these might feel a little unusual at first, but they are surprisingly simple once you understand how to navigate around the post of the stitch below.
Front Post Double Crochet (Fpdc) creates a ridge that pops toward you. To execute this stitch, yarn over and insert your hook from the front of your work to the back, then back around to the front, passing your hook behind the post of the indicated stitch. You are essentially tucking your hook behind the post, creating a loop that sits in front of the fabric. Once you pull up your loop, you complete the double crochet as you normally would. When you work this stitch, you skip the actual top loops of the stitch you just worked around, ensuring you keep your stitch count accurate.
Back Post Double Crochet (Bpdc) works the opposite way, pushing the stitch away from you to create a recessed ridge. For this technique, yarn over and insert your hook from the back of the work to the front, and then back to the back, passing your hook around the front of the post. It helps to tilt your work slightly to see the post clearly. Again, once you pull up your loop, finish your double crochet. Like the front post version, you skip the top loops of that same stitch.
Practice these movements a few times on a small swatch before starting your main panels. The beauty of these stitches is how they pull the fabric into a ribbed, stretchy texture that holds its shape beautifully. Keep your tension consistent, especially when working around the posts, to ensure the finished edges look clean and professional.
Creating the back panel
Step 1: Foundation and Back Panel
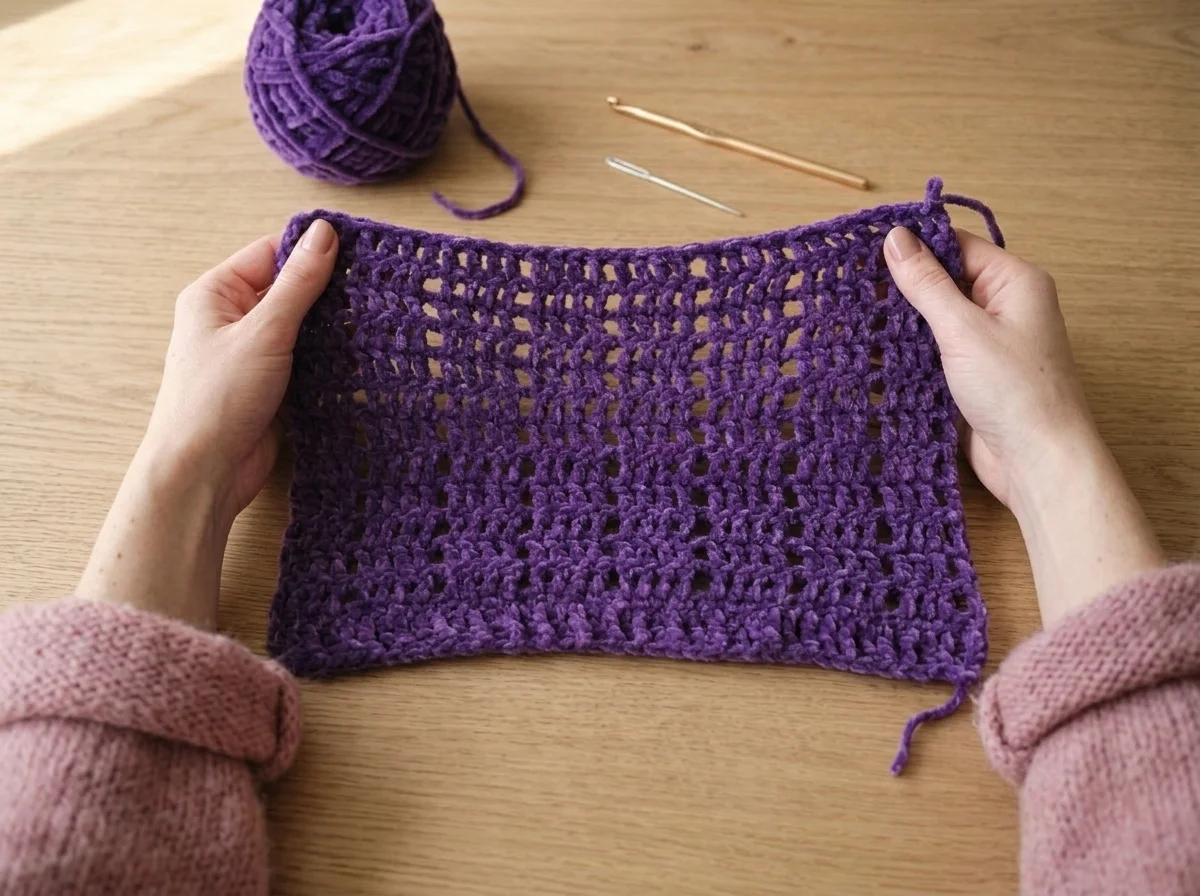
We begin the back panel by establishing our foundation chain and a sturdy single crochet base. This sets the stage for the openwork pattern that creates the lovely drape of this poncho. Take your time with the foundation chain, as a consistent tension here ensures your work stays square.
Follow these instructions to build the back of the poncho:
- Ch 66 (71, 76, 81).
- Row 1: Sc in 2nd ch from hook and each ch across – 65 (70, 75, 80) sc.
- Row 2: Ch 3 (counts as first dc here and throughout), turn, dc in next sc, [ch 1, skip next sc, dc in next 4 sc] across to last 3 sc, ch 1, skip next sc, dc in last 2 sc – 65 (70, 75, 80) sts.
- Row 3: Ch 3, turn, dc in next dc, [ch 1, skip next ch-1 space, dc in next 4 dc] across to last 3 sts, ch 1, skip next ch-1 space, dc in last 2 dc – 65 (70, 75, 80) sts.
- Repeat Row 3 for 16 (18, 20, 22) more rows and piece measures 12 (13, 14.5, 16) inches [30.5 (33, 37, 40.5) cm] from beginning. Fasten off.
The single crochet base in Row 1 provides a stable anchor. Starting with Row 2, you will notice the openwork pattern emerging. By skipping stitches and creating chain-1 spaces, we create the airy, breathable look that makes this poncho comfortable for active kids.
As you work through the repeats in Row 3, you will notice the chain-1 spaces align with the skipped stitches from the row below. This makes it very easy to track your progress. Keep an eye on your stitch counts for each row; maintaining 65 (70, 75, 80) stitches across will ensure that your piece keeps a uniform width from top to bottom. If you find your edges pulling in or flaring out, double-check that you are correctly counting the turning chains as stitches and not skipping them accidentally. Once you have reached the required length for your chosen size, fasten off your yarn, leaving a short tail to weave in later. Your back panel should now be soft, flexible, and ready for the next phase of construction.
Adding the bottom edging
Adding the Bottom Edging
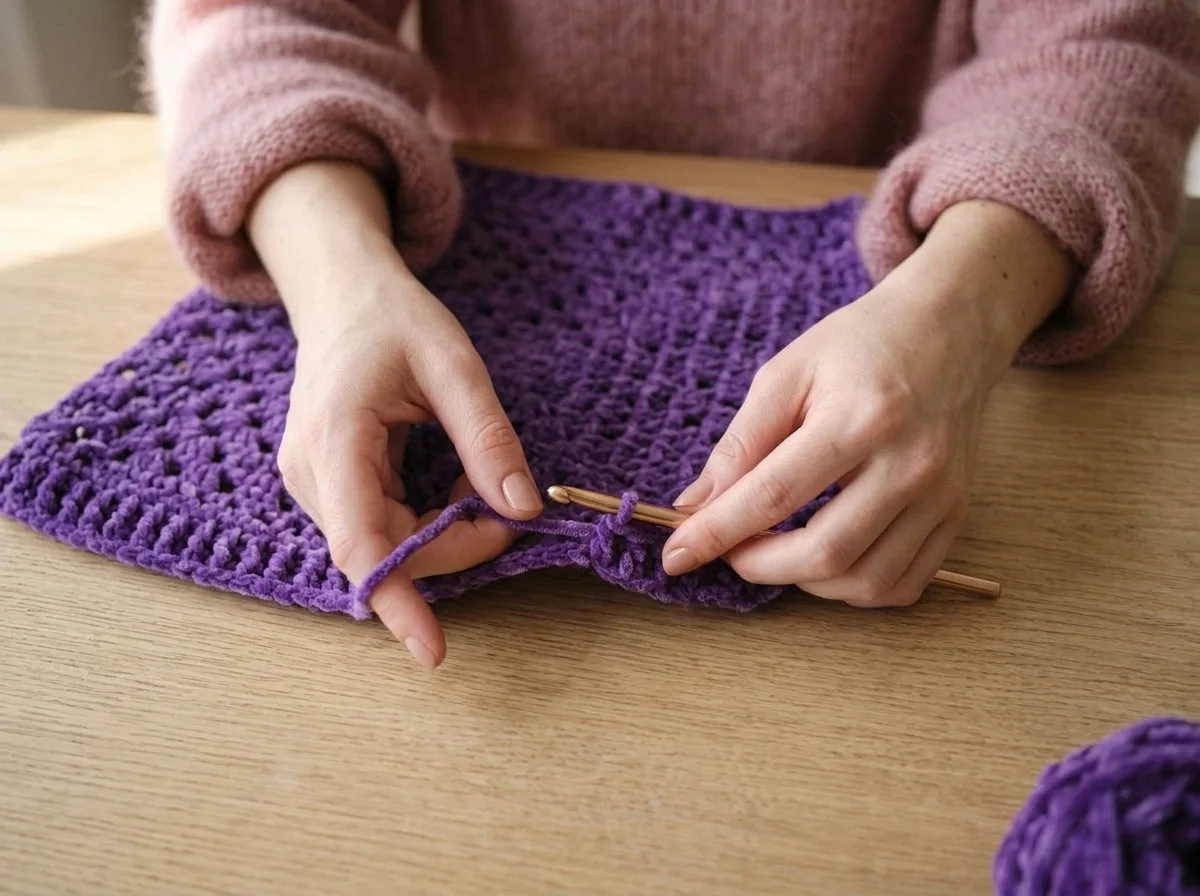
Now that the back panel is worked to the proper length, we will add a decorative and structural bottom edge. This edging uses post stitches to create a ribbing effect that mirrors the neck trim we will work later, giving the garment a professional, polished finish. Working along the bottom allows us to frame the openwork stitch pattern perfectly. You will be working into the opposite side of your foundation chain. Make sure to have the right side of your work facing you before joining your yarn.
Row 1: With right side facing and working along opposite edge of foundation ch, join yarn at right side with a slip st, ch 3, dc in each ch across lower edge – 65 (70, 75, 80) dc.
Row 2: Ch 2 (counts as first post st), turn, [Bpdc in next dc, Fpdc in next dc] across to last 0 (1, 0, 1) st, Bpdc in last 0 (1, 0, 1) st. Fasten off.
When working Row 1, focus on spacing your stitches evenly across the foundation chain. Even though the foundation chain already has the stitches from your first row of the poncho, working into the opposite loops creates a clean edge. For Row 2, remember that a back post double crochet (Bpdc) is worked by inserting your hook from back to front around the post, while a front post double crochet (Fpdc) is worked from front to back. This alternation creates a subtle ribbed texture that provides just enough structure to the hem without making it too stiff. If your stitch count doesn’t match the final stitch on the row, double-check your repeats to ensure you haven’t accidentally skipped or added an extra Bpdc or Fpdc. Once you fasten off, you are ready to move on to the front panel construction.
Working the front panel with neck shaping
Working the Front Panel
The front panel begins exactly like the back panel. You will follow the same foundation chain and row-by-row instructions to establish the pattern until you reach the specified length for your chosen size. This ensures that the front and back pieces match perfectly before we create the neck opening.
Work same as for Back until 16 (18, 20, 22) rows have been worked and piece measures 10.5 (11.5, 13, 14.5) inches [26.5 (29, 33, 37) cm] from beginning.
When working this piece, keep your tension consistent. Because we are using a soft, fuzzy yarn, it can sometimes be difficult to see the stitches clearly. I like to count my stitches at the end of every row to make sure I haven’t accidentally missed a chain-1 space or added an extra stitch.
Shaping the Neck and Shoulders
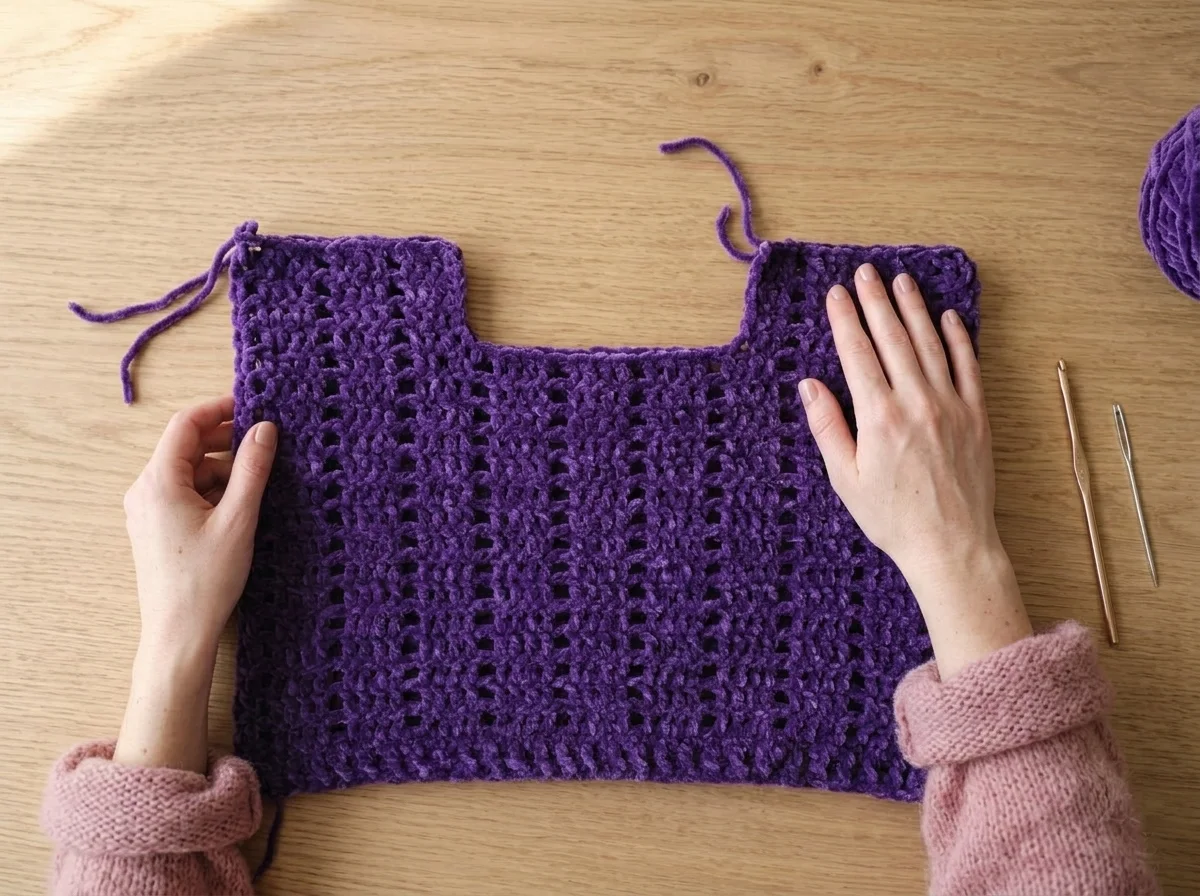
Now we create the opening for the head by splitting the work into two separate shoulders. This is the most important part of the assembly, as it determines how the poncho sits on the shoulders. You will work the first shoulder, fasten off, and then join your yarn to work the second side.
First Shoulder
- Row 1: Keeping in pattern st, work across first 22 (24, 26, 28) sts, leave remaining sts unworked.
- Row 2: Work in pattern st across 22 (24, 26, 28) sts. Fasten off.
Second Shoulder
- Row 1: Skip next 21 (22, 23, 24) unworked sts on last full row worked, join yarn in next st with a slip st, ch 3, work in pattern to end of row.
- Row 2: Work in pattern st across 22 (24, 26, 28) sts. Fasten off.
- Work Bottom Edging as for Back.
Take your time when joining the yarn for the second shoulder. Ensure you are skipping the correct number of stitches in the center to create a symmetrical neckline. If your count feels off, recount the unworked stitches before you secure the yarn. Once both shoulders are finished, you are ready to move on to seaming the sides and completing the edging.
Assembly and finishing details
Step 4: Side Edging and Assembly
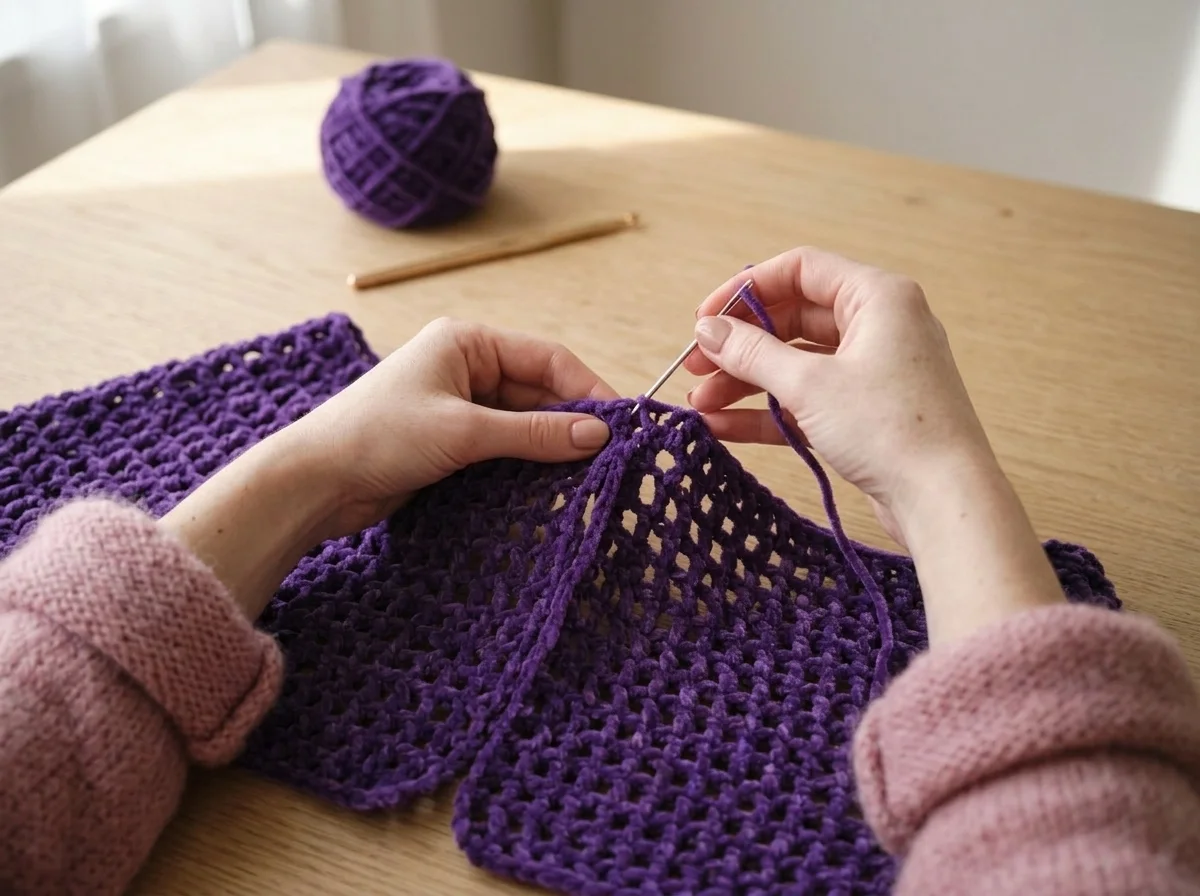
Now that your front and back panels are complete, it is time to turn these flat rectangles into a cozy wearable. Start by aligning your front and back panels with the wrong sides facing together. Using your yarn needle and a matching length of yarn, sew the shoulder seams. You will want to use a simple whip stitch or mattress stitch, keeping your tension even so the seams remain soft and comfortable against the skin.
Next, we will work the side edging to give the sides a clean, professional finish. Keep your poncho pieces joined at the shoulders and lay them flat.
Finishing
- Sew Shoulders.
- Row 1: With right side facing, join yarn at side edge at lower edge of Back with a ch 1, sc evenly spaced along side edge from lower edge of Back to lower edge of Front.
- Row 2: Ch 1, turn, sc in each st across. Fasten off. Repeat along opposite side edge.
- Sew side seams 6 (7, 8, 9) inches [15 (18, 20.5, 23) cm] from lower edge.
After finishing the edging on both sides, you will sew the final side seams. Starting from the bottom, sew the side edges together for the specified distance. Stopping at this measurement ensures there is enough room for armholes, allowing the poncho to drape naturally.
Step 5: Neck Edging
The neck edging not only tidies up the opening but adds a lovely, structured frame to the poncho. Since we are working in rounds now, you will keep your project joined as one piece.
Neck Edging
- Round 1: With right side facing, join yarn at right shoulder seam ready to work across Back neck, sc 21 (22, 23, 24) sts evenly spaced across back neck, sc 6 sts along edges of rows of Front Neck, sc 21 (22, 23, 24) st across Front Neck, sc 6 along edges of Front Neck, slip st in first sc to join – 54 (56, 58, 60) sc.
- Round 2: Ch 3, dc in each sc around, slip st in top of beginning ch-3 – 54 (56, 58, 60) dc.
- Round 3: Ch 2, turn, [Bpdc in next dc, Fpdc in next dc] around to last st, Bpdc in last dc, slip st in top of beginning ch-2. Fasten off.
- Weave in ends.
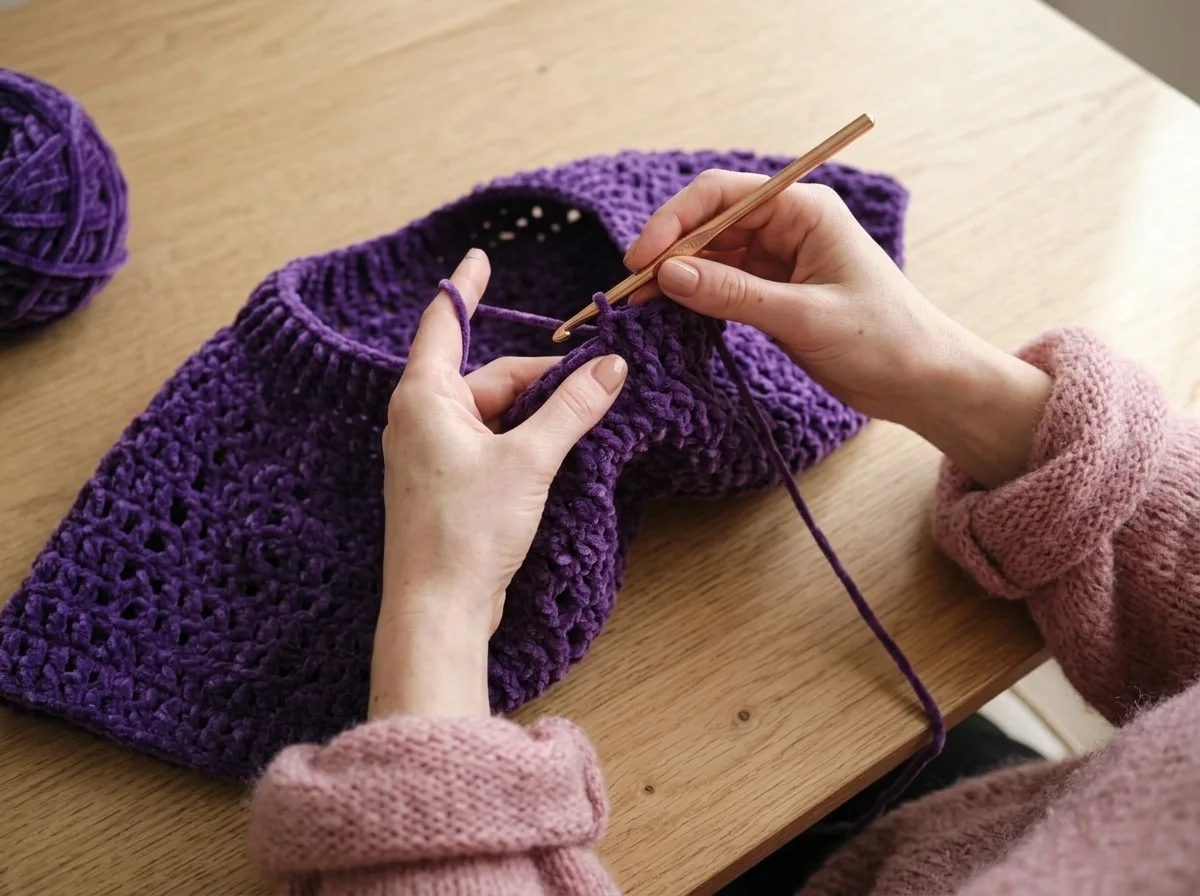
Take your time when placing the single crochet stitches around the neck opening. Even spacing is the key to preventing the neckline from ruffling or pulling too tight. The post stitches in the final round provide that signature texture we used at the bottom hem, creating a cohesive look. Once finished, use your yarn needle to weave in any remaining ends securely on the wrong side of the fabric.
Fixing common mistakes
Even the most experienced makers run into a snag now and then. When you are working with a soft, plush yarn, keeping your stitches consistent is the best way to ensure your garment turns out exactly the size you intended. The biggest challenge with this type of yarn is that the pile can sometimes make it difficult to see your stitch definition. If you find yourself struggling to identify where to place your hook, try using a slightly larger hook than recommended, or slow down and use your fingers to feel for the gaps between stitches if your eyes are getting tired.
If you find your stitch counts are drifting, the culprit is often skipping a stitch or working an extra one into a chain space. Because this pattern relies on a repeating openwork structure, it is incredibly helpful to place a stitch marker at the beginning and end of every row. This simple habit keeps your edges straight and prevents the piece from accidentally growing or shrinking as you work upward.
Another common hurdle is working with post stitches for the first time. If your tension feels too tight, your edges might start to curl. If this happens, try to consciously loosen the loop on your hook before pulling through your post stitch. Keep in mind that post stitches are inherently bulkier than standard stitches, so they naturally pull the fabric inward slightly. This is normal and provides that beautiful, finished structure we want for the bottom and neck edges.
Finally, avoid the urge to pull your yarn too tightly when fastening off or seaming. Chenille yarn can be delicate, and excessive tension may cause the fiber to snap or distort. If you ever feel frustrated, take a break. Your project will be right there when you return, and your stitches will look much cleaner when your hands are relaxed.
Care and washing
Because this project uses soft, plush chenille yarn, it requires a gentle touch when it comes to cleaning. You want to maintain that velvety texture and prevent the fibers from matting, so a little extra care goes a long way in ensuring the garment lasts through many wears.
I always recommend hand washing your handmade pieces in cool water with a mild detergent. Avoid harsh scrubbing or wringing out the fabric, as this can pull on the delicate stitches and distort the shape of the poncho. Instead, gently squeeze the sudsy water through the item. When you are ready to rinse, use cool water again and press gently to remove the excess moisture.
Drying is just as important as washing. Lay the poncho flat on a clean, dry towel, smoothing it out to its correct dimensions. Let it air dry away from direct heat or sunlight, which can cause the synthetic fibers to lose their softness or color vibrancy over time. If you notice any loose ends after washing, simply weave them back into the fabric with your yarn needle, which will keep your stitches secure for the long haul. With these simple habits, your hard work will stay soft, cozy, and ready for your little one to enjoy.
Frequently Asked Questions
Is this crochet fashion poncho suitable for complete beginners?
Yes, it is designed for beginners. If you are comfortable with basic double crochet and single crochet, you can easily master the post stitches used here.
Can I use a different yarn?
While this pattern is designed for a soft chenille-style yarn, you can use any light-weight yarn that allows you to achieve the correct gauge.
How do I ensure the sizes fit correctly?
Always check your gauge before starting. If your stitches are too loose or too tight, the finished dimensions will not match the pattern.
How do I maintain the texture of chenille yarn?
Treat chenille gently. Avoid aggressive tugging and use a hook size that allows the stitches to remain relaxed.
How long does this project take to finish?
Because it uses a light-weight yarn and has a relatively simple construction, most makers can complete this poncho in just a few sittings.
Maker Notes & Questions